Editing Fashion Photos

IMG_1609.JPG

For this portrait shot, I made sure to include the model’s full body to be able to show her fashion choices, and also to allow the viewer to see that the photo is taken from a low angle. This low angle adds to the model’s attitude and shows that she has superiority. Her facial expression is neutral, meaning that the viewer has to figure out, by using reception theory and deciphering the semiotics of the shot’s angles, and colours used, how she is feeling and what impression she is giving off. As I talked about in my blog about semiotics, colours can give the viewer different impressions and ideas regarding the subject. In this shot, her face is in the red light, suggesting that out of the blue and red (possibly representing light and dark), she favours the dark.
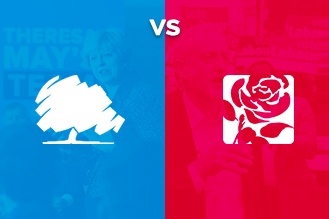
Image result for labour and conservative

Image result for red and blue star wars

I chose to use the red and blue colours for this shot because, traditionally in media, there are two apposing sides to many stories: the two main political parties in both the UK and the USA use the colours red or blue, and the good and bad side of stories in pop culture often use red and blue. These contrasting colours are used to show two sides of conflict and arguments, which I wanted to see shown through my photography. The lights show how there is conflict in my model. Using a shade of dark red on the model’s face shows that she is possibly favouring the darker side of her inner-conflict, which gives a menacing and intimidating feel: working alongside the low camera angle used in this shot.

For this photo, I wanted to do something different and more creative with the editing. I decided to take inspiration from the electronic duo Disclosure, who often feature a simple but effective editing technique in a lot of their promotional work. Essentially, I wanted to do a simpler version of this, where I would outline my model’s facial features. I chose this specific photograph because it’s quite dark, so I think using the white to outline the facial features works best here: it means that the user can see exactly where her facial details are.

Image result for disclosure

The outline also gives an anonymous and mysterious feel to the subject because it covers part of her face, which is reinforced by the already dark image. To achieve this look, I simply chose the brush tool, altered the size and chose a brush that looked similar to the one that Disclosure use in their work. I then drew around the outline of the subject’s head, eyes, nose and mouth. Choosing the right size brush was important to make sure that it was visible but not too big so that it would get in the way of the face.

Screen Shot 2019-06-11 at 15.26.13.png

For this photo, I altered the hue (the original is on the left and the edit on the right). I like this edit because it has completely changed the shade of yellow that has been used, and gives a different impression of the model. The hue has become much warmer and, consequently, so has the model. The original yellow was quite bright and harsh, especially when compared to the very dark blue.

Below is a link to my new fashion photos:

https://drive.google.com/open?id=1wW6Hj1iFBOCRLAlkLUiYqy9D-7ZKf41g


References

Billboard. (2019). Disclosure’s 15 Best Songs: Critics’ Picks. [online] Available at: https://www.billboard.com/articles/news/dance/7647013/disclosure-songs-best-hits-list [Accessed 11 Jun. 2019].

Fujikawa, J. and Fujikawa, J. (2019). In a Lightsaber Waffle Duel, Everyone Wins | StarWars.com. [online] StarWars.com. Available at: https://www.starwars.com/news/lightsaber-waffle-sticks [Accessed 11 Jun. 2019].

Search Laboratory UK. (2019). Conservative vs. Labour websites – which is more likely to convert voters? | Search Laboratory. [online] Available at: https://www.searchlaboratory.com/2017/06/conservative-vs-labour-websites-which-is-more-likely-to-convert-voters/ [Accessed 11 Jun. 2019].

YouTube. (2019). How to Create Outline Portrait Effect in Photoshop – #Photoshop Tutorials. [online] Available at: https://www.youtube.com/watch?v=oScONltOqAs [Accessed 11 Jun. 2019].


Editing Night Time Photos

IMG_6094

With this photo, I referred back to my research from earlier in the project regarding leading lines. The leading lines in this photo lead to a dark area that can’t quite be fully seen – which gives a mysterious feeling to the photo. Furthermore, after discussing this image with my teacher, we also noted how the sky looked gloomy and gave an almost foreboding feeling to the photo. To accompany these features, I decided to edit the photo to black and white. This would add to the mysterious and gloomy feeling, but also allow me to refer back to my original research, where I discussed the use of black and white in photos with prominent leading lines. It allows the viewer to focus more on the leading lines rather than the colours in the photograph.

IMG_6094 EDITED

Screen Shot 2019-06-11 at 12.48.45.png

To make the photo black and white, I simply chose ‘Image’, ‘Adjustments’ and then ‘Black and white’. The photo then changed to black and white and the above menu opened. Here, I could change how dark/light each colour was specifically. This meant that I could choose to keep the blue of the sky as quite light, which kept the gloomy and mysterious feeling to the photo. I altered the other colours and their shades of darkness until I found a final image that I was happy with, which I used.

To edit this photo, I wanted to try a new technique. Called colour splash, this technique involves making the photo black and white and then editing a certain part back into colour. I chose to keep the “Tesco express” sign in colour because it is the most eye-catching part of the photo. The illuminated colours are bold and stand out, particularly in a black and white photo.

To create this effect, I followed a tutorial that I found online. Essentially, I added a “gradient map” which made the whole photo a black and white. Then, with this layer mask selected, I used the brush to remove some of the layer, basically bringing the colour from the selected area back into the image. As the screenshot above shows, I zoomed in very closely to the image and used a small brush size to make sure that I clearly cut around the letters and shapes and that only their colour was brought through. The final image is also shown above, where only the illuminated “Tesco express” is in colour in the photo.

I like the end result because the black and white adds to the deserted and lonely feeling that the photo brings from showing a (usually busy) shop at night time. The splash of colour makes the photo more appealing, because it draws the user’s eyes in to a specific part of the photo and, essentially, it looks nicer than just a black and white photo.

IMG_6121 EDITED.jpg

Screen Shot 2019-06-11 at 14.43.33.png

For this photo, I wanted to keep it simple by only changing some of the ‘Image’ settings. The brightness and contrast were the settings that needed the biggest alteration. Because I am doing night time photos, a lot are, of course, very dark images. This means that I upped the brightness by a fair bit because it meant that the details inside the photograph were easier to see. Equally, the contrast settings then needed adjusting to balance the photo.

Below is a link to my new night time photos:

https://drive.google.com/open?id=1Kl12RAdUOdgtvmv3HKyr8gVkGAfOgWqv


References

Photoshop Essentials. (2019). Easy Photoshop Color Splash Effect Without Selections. [online] Available at: https://www.photoshopessentials.com/photo-effects/easy-photoshop-color-splash-effect/ [Accessed 11 Jun. 2019].

New Night Time Photos

As well as some of my fashion photos, there were some night time photos that also needed re-shooting. As with all different types of photography, a certain set of equipment is required to achieve the best possible photos. For night time photography, a DSLR and a tripod are the two essential pieces of equipment that is needed to get the perfect shot.

For my night time photography, I chose a long shutter speed, an ISO around 800, and the aperture around f/14. These settings were ideal for night time photography. A long shutter speed allows as much light into the lens as possible. The aperture doesn’t need to be particularly wide because there isn’t a specific part of the photo that will need to be focussed on, and rather that the whole scene needs to be in focus. The tripod was essential for night time photography because when a DSLR is shooting with a long shutter speed, the camera must be held completely still so that the final photo is perfectly clear and doesn’t have any blurriness.

For my night time photos I of course needed to wait until it got dark before I could take any images. Once it became dark, I headed out to various locations around my local town to get some photos. These included the train station, a couple of high street stores, and a corner shop. I chose these locations because they are places that are traditionally busy during the day, but by night are quite deserted. The train station was my first idea because of the leading lines and lighting at such a place. I tried to capture these by taking the photo from a low angle, and by taking the photo in landscape (which is the direction the leading lines are). Also, because it was late there weren’t many trains about so this made taking the photographs easier.

IMG_6094.JPG

I found the hardest part about photography at night time is keeping the camera still long enough to take a good photo. A lot of the time, any small movement (even pressing the shutter release too hard) can lead to blurriness in the final photo. This meant I had to be extra careful around the camera while it was taking the shot, and also why a tripod is so important to use in night time photography.

With this set of photos, a lot are clearer than my previous efforts and I can more confidently present them. This time, conditions were more favourable which meant I could attempt more shots and eventually get the final shot that I hoped for.

New Fashion Photographs

After discussing with my teacher and concluding that some of my original fashion photos weren’t to the best of my ability, we decided that I should take some more photos. I wanted, after being unsuccessful with some of my street fashion photos, to try something new. This meant that I decided to do my new fashion shots in a studio rather than out on the street. Doing so gave me more freedom in terms of when I can take the photos because of the use of the college facilities.

For me to take these photos, I needed to organise some equipment. I emailed the Media Bookings college email asking for a DSLR, some LED lights, some coloured gels and access to the studio. Fortunately, all of these were available, and so I could take the photos when I wanted to. The LED lights and coloured gels were important in the studio because these were how I was going to light my subject. The LED lights were pointed at my subject by two separate assistants, each with a different coloured gel over the light. This meant that different coloured lighting illuminated the subject, giving an effect shown in the photos below.

We experimented using different coloured gels to get different light shades on my subject to see which looked best. Each mix of colours created a different atmosphere and feeling. For example, we could use darker shades to create a more moody and serious atmosphere for the photos, or we could use lighter shades such as yellow to give a more positive and happy impression of the model. I used red in some shots to show the strong emotions of the model.

Image result for colours and their meanings

Similarly to my street fashion photos, pose and facial expression were important for these portrait shots. They accompany the fashion and help create an impression of the subject for the viewer. Not only did I experiment with different lighting, but I also tried different outfits on my subject. This way, I could gather a range of different photos with various combinations of lighting and clothing.

IMG_1582.JPG

For these photos, I used a wide aperture and a low ISO, and altered the shutter speed to accommodate the other two settings. I chose a wide aperture as my priority because it meant that the subject would definitely be in focus. I also wanted a low ISO because it would mean the final photograph wouldn’t be grainy and instead be in fine detail. The shutter speed changed according to what lighting was being used and if the final photo appeared too light or too dark.

I am more confident and happier with this set of photos, as when opened on the computer they already look better than the other ones. I enjoyed experimenting with the different coloured gels and creating different moods and impressions of the subject through lighting, accompanied by her facial expressions and fashion choices. I now need to edit the photos, exploring new techniques and seeing how I have improved since my original fashion photographs.

References

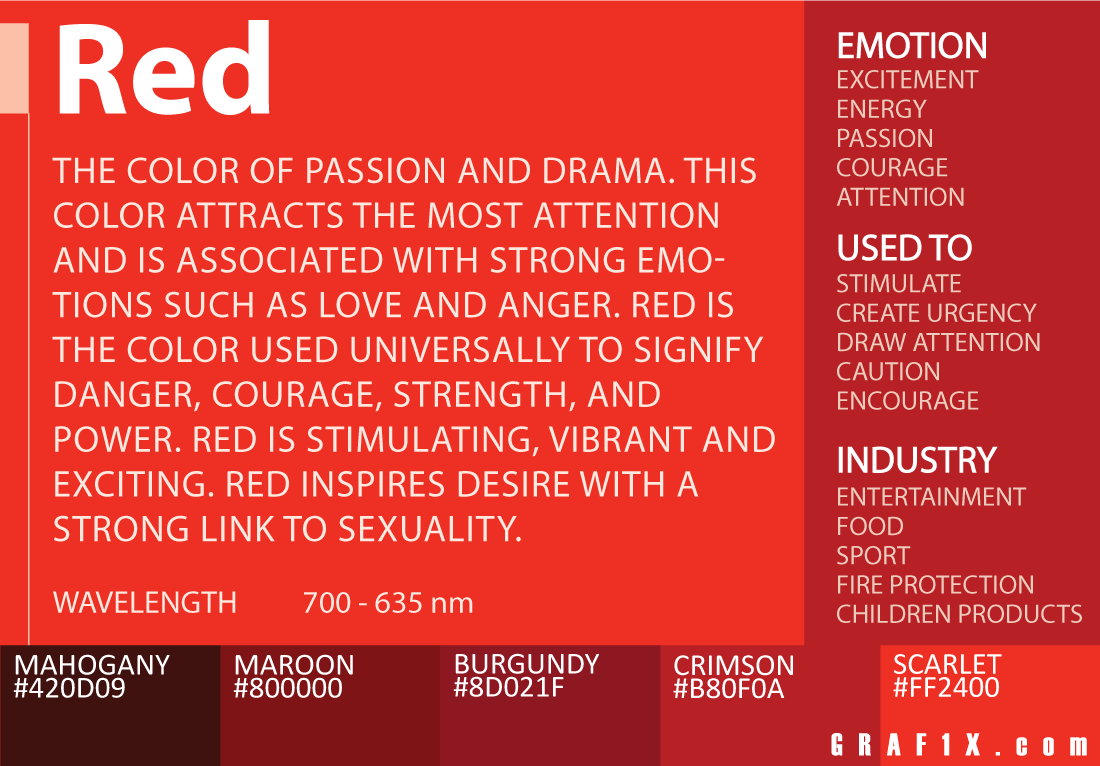
Graf1x.com. (2019). Color Meaning and Psychology – graf1x.com. [online] Available at: https://graf1x.com/color-psychology-emotion-meaning-poster/ [Accessed 6 Jun. 2019].

Retro Albert Docks Edit

I wanted to create a retro edit for this particular shot of the Royal Albert Docks because I know it’s a place with a history (dating back to 1839), so this fits the vintage theme of the edit. The image on the left is the original photo, and the image on the right is the retro edit. Similar to my pencil sketch edit, I followed a tutorial to show me how to achieve this vintage effect.

The first and most important instruction was to click on the adjustments layer icon and to select ‘Colour Lookup’. This presented me with a lot of options regarding filters and colour effects that I could apply to my image. I then chose ‘Abstract’ from the three available tabs, and chose the setting Gold-Crimson. This is possibly the most important step because it is what gives the image its main bronze colour and the rest of the steps are simple alterations to this to give it more of a retro feel.

screen-shot-2019-06-19-at-11.16.44.png

To add a “vignette”, I duplicated the background layer and converted the duplicate to a smart object. This, as with the pencil sketch, means that I can make changes and apply filters but none of it is set in stone: I can edit and change these settings in the future. I then went to Filter>Lens Correction to add a vignette and changed the midpoint and amount. This gave the effect of the darker edges round the side of the photograph. Finally, I added a grain effect to the photo by going into Filter>Filter Gallery, where under the ‘Texture’ section I added the ‘Grain’ effect. This then gave me my final edited version of the Albert Docks photo.

Retro Albert Docks.jpg

I like the final edit and outcome of this photograph because it looks very vintage and as though the photo could’ve been taken many decades ago. I think this was the perfect photo to use to do try this effect with because of the history of the site.


References

Staff, C. (2019). Apply a quick vintage look in Photoshop. [online] Creative Bloq. Available at: https://www.creativebloq.com/photoshop/apply-quick-vintage-look-photoshop-10121078 [Accessed 9 May 2019].

Visitliverpool.com. (2019). The Royal Albert Dock – Heritage/Visitor Centre in Liverpool, Liverpool – Visit Liverpool. [online] Available at: https://www.visitliverpool.com/things-to-do/the-royal-albert-dock-p16143 [Accessed 9 May 2019].

Editing Photos – Architecture

My architecture photos took me to Liverpool, Manchester and Preston. Travelling around to these different cities allowed me to photograph some very different structures. In terms of the exposure triangle, I think the architecture photos may have been the easiest to calculate. The shutter speed could be at a speed that meant I wouldn’t need to use a tripod, and the ISO and aperture just needed altering until the photograph looked its best, I didn’t need to use a particularly large aperture seeing as I didn’t want a massive depth of field, as I wanted to photograph the buildings as a whole.

Screen Shot 2019-05-07 at 15.15.57.png

While editing this photo, I looked at altering the curves. My teacher showed me this method of editing a photo, and essentially the best way to do it is to try and get the curves in the shape of an “S”, and then play around with it to get the best possible end result. Altering the colour balance only slightly meant that the final edited version looked brighter and more vibrant rather than dull.

Again, with the image above I played with the curves. The image on the right (the edited version) is darker and the blue in the sky has been made clearer to add more context and to liven up the image. I chose not to crop this image because of the lines and patterns that run throughout the photograph, and there would be a risk of ruining this through cropping.

Screen Shot 2019-05-07 at 14.56.15.png

On the contrary, this photo didn’t need much editing beyond cropping. The slight crop meant that the photograph still had context (by including the people walking in the foreground) but also allows the viewer to focus more on the building.


Here is a link to all of my edited architecture photos:

https://drive.google.com/drive/folders/1aQyu3SgDsWMACUEruP51AaicVlZ42FXP?usp=sharing

Editing Photos – Night Time

I chose to edit all of my photos using Photoshop. This is because it is the software I am most familiar with using for editing photos, having used it in high school as well as throughout college.

My night time photos proved to be the genre that I found the most difficult in terms of getting the desired end result. To capture a “night-time” scene, the shutter speed needs to be at least around 5 seconds. This means the camera needs to stay completely still during this time so that the final image comes out clearly rather than blurred. I used a tripod to keep the camera still, but I think other factors such as passing cars and people walking by may have affected the camera because, despite my best efforts, some of the images still weren’t perfectly clear.

With this in mind, it meant that when editing the photo below, I focussed on making the colours more eye-catching (whilst still being natural). Altering the shadows, highlights and vibrancy of the image allowed me to make the colours the focal point while still achieving my original goal of showing a (usually busy) city street at night time when it’s at its quietest.

Screen Shot 2019-05-10 at 12.27.35.png

Screen Shot 2019-05-10 at 11.01.10.png

With the image above, I altered the colour balance. I deliberately chose to have less blue in the photo so that there could be more focus on the lights and reflections in the water rather than on the sky, as this was my original intention. I chose not to crop the boats and ferris wheel out of the image as they add more context and depth to the image. Without them, the photo would be purely the lights and their reflections on the water which, while it would look impressive, might not be a perfect representation of Albert Docks. I wanted to show this structure and its beauty as a whole.

The photograph above (the left photo is the original, the right is the edited version) was a challenging photo to take. This was because of the rain that had affected the lens and the struggle of keeping the camera dry whilst also keeping the camera still long enough for the shutter speed to allow enough light in to the lens. It wasn’t possible to put the camera on the floor to keep it still due to the conditions. Because of this, I edited this photo to be lighter. I also changed the shadows/highlights so that the there wasn’t much camera flare after making the image lighter, and the flare on the image on the right is significantly less than what it was. The editing was important because on the left (the original image) the only things that can be seen in the photo are the car’s headlights and the traffic light itself.

Screen Shot 2019-05-10 at 12.31.59

Finally, with this architecture photo of Preston Station, I chose to crop it. This is because it allows the viewer to focus more on the patterns included in the photo that make it more interesting, rather than the unnecessary space at the top and bottom of the image.

Here is a link to all of my edited night time photos:

https://drive.google.com/drive/folders/1z93VLRrmrLWZY0RAKbKFka_yZazo-TWq?usp=sharing

Pencil Sketch Edit

To explore some more experimental and different edits for me to do on Photoshop, I googled some tutorials on how to create a pencil sketch edit. I decided a pencil sketch would work well for one of my fashion photos as these are all portrait shots, and often sketches will be of a model or a certain subject for the drawing. Below, on the left, is a simple edit of my photo (cropped and slightly altered contrast/brightness), and on the right is the final pencil sketch edit. I particularly chose this picture because it was a simple portrait shot of my subject with a strong pose and outfit choices, but also with a plain background. A plain background is best to use because often with pencil sketches, there can be a loss of depth of field, but I wanted to keep the final image simple so chose to use something with a plain background.

The tutorial took me through, step-by-step, how to create this effect. I began by creating a new duplicate layer, inverting the image, and then converting this layer to a Smart Object. Because I made the layer a Smart Object, it meant that any filters I applied were considered Smart Filters, meaning that their effects aren’t permanent and instead, they can be fine tuned later on. This is important so that if I don’t like a certain way a filter looks, I can change it at any point in the process if I change my mind.

Screen Shot 2019-06-19 at 09.54.52.png

Inverting the image meant that it didn’t look anything near the final image. However, after applying a black and white adjustment layer, the image started to look more like the final outcome and have that pencil sketch look. The rest of the steps after these were minor changes to make the image look more realistic to a pencil sketch. A step that was important for this image, particularly because I kept adding new layers, was to change the blending mode to multiply. This would make the background transparent and allow the previous layers to also be seen at the same time.

Screen Shot 2019-06-19 at 10.05.09


References

Spoon Graphics. (2019). How To Create a Realistic Pencil Sketch Effect in Photoshop. [online] Available at: https://blog.spoongraphics.co.uk/tutorials/how-to-create-a-realistic-pencil-sketch-effect-in-photoshop [Accessed 6 May. 2019].


Editing Photos – Fashion

My fashion photographs were my favourite to take. I enjoyed experimenting with aperture and seeing how this effects other parts of the exposure triangle such as shutter speed and ISO. I would often use the largest aperture possible (around f/4.5) to get the biggest depth of field possible and have all the focus on the subject.

Screen Shot 2019-05-10 at 12.56.40.png

When editing, most, but not all, of the changes I needed to make were in the framing. I cropped this image so that there is no unnecessary space around the subject and so that the viewer can focus solely on them. I did, with this image, also change the vibrancy and make the image brighter. This mostly changed the background which, unfortunately on the day, was quite dull. After editing, the scene looked brighter as a whole.

Screen Shot 2019-05-10 at 13.02.45.png

With the image above, I cropped it and then only slightly adjusted the highlights so that the image looked brighter but not still realistic. This is the kind of look that I wanted to achieve through my editing, as I only wanted to make small improvements to each photo and to mostly rely on my own photography. I only want the editing to slightly alter the photo to become a better version of itself rather than a completely new image.

Screen Shot 2019-05-10 at 13.54.35.png

Finally, this photo is one of my favourites from all of my photography. This meant that I didn’t want to edit it much, so only cropped the image. The original, in my opinion, had too much headroom, so the cropped version allows a closer look and focus on the subject.

Cropping is a good way to make sure the photo abides the rule of thirds, as it means that I can choose where the border of the photo actually is. This means that I can place the subjects face into where the top horizontal line would be, and make the image perfectly follow the rule of thirds.


Here is a link to all of my edited fashion photos:

https://drive.google.com/drive/folders/11jlqOOtkEw2qivRa2LH8t1teHgicKcPL?usp=sharing

Shooting the Photographs

Through my three different themes, I have been able to explore various techniques and styles. I wanted to choose three different photography themes so that I could test myself and try to show my skills in all different areas of photography.

Possibly one of the hardest photographs to take was the shot of the light trails on the motorway. For this, I had to keep the camera completely still (so to use a tripod was essential) for a relatively long time. This shot in particular had a shutter speed of 13 seconds. Pressing the shutter release and them removing my hand immediately was the best way to keep the camera still. Fortunately, there weren’t any people walking around so the camera wasn’t disturbed in that sense.

0853 (E).jpg

This, of course, wasn’t the only photo that I got. This was one of many attempts, with a lot of them not looking as good as I had hoped. The shots below are some of my failed shots. You can see that some of the light trails themselves are blurry, there are rain drops on the camera lens and some of the finer details aren’t clear. To get the photo that I chose to use, I had to persevere and continue taking the photos, each time being careful to make sure there is as little movement on the camera as possible.

Something else that was completely new to me in this project was shooting in manual. When I first prepare to take the picture of a new scene, because I am new to these settings and understanding what they mean, it would take me a few attempts to get the right settings and take a picture that would be good enough to use. Often, the first two or three shots will be me finding out which settings are working in the current lighting and which to change. I also referred back to my research on what settings should be used for each theme, as these were good basic outlines for what I should have my ISO, aperture and shutter speed on. The two photos below show how the final photograph can change with the settings. The biggest change was the ISO. I felt comfortable using a ISO of 3200, because I knew it was a wide shot where it would be difficult to notice how “grainy” it is. The aperture and shutter speed was the same for both photos. Eventually, I ended up not using either of these images as one of my final photographs.

As I mentioned before, shooting at night raises its own challenges and problems. Using a tripod is the best way to keep the camera stabilised while using a long shutter speed – which is necessary to allow as much light into the lens as possible. Sometimes, though, I found it wasn’t possible to use a tripod. For example, when photographing the fairy lights, they were too high up and there wasn’t anywhere to place my tripod. This meant that I had to keep the camera hand-held, meaning there was a lot of movement and the photos didn’t come out as planned. The second photo below was included in my final photos.

Another technique that I explored through my photography, after looking at it in my research stages, was leading lines. After taking an unsuccessful shot in my practise shots from the inside of the Anglican Cathedral in Liverpool, this time I made sure not to repeat the same mistake. For my practise shots, I took a photo of leading lines that ran vertically through the photo, alongside a vertical window. Unfortunately, the shot I took was in landscape, which didn’t allow the leading lines to be fully appreciated. This time, however, when I photographed the same scene, I made sure to shoot in portrait. This meant that the viewer could easily follow the leading lines of the columns running vertically through the photograph.

IMG_0483.JPG

I also made sure to include leading lines in this shot of the Hilton Hotel in Manchester. I wanted to include leading lines in this photo because it’s a relatively simple photo: there isn’t any foreground and the background is just the plain sky but with a streak in of jet trails. The trails in the sky are parallel to the building’s lines, which creates an interesting shot and adds another dimension to it rather than it just being a shot of a building.

0581 (E).jpg

With the photo below, I tried to refer back to some of my original research and look at using the rule of thirds. The head of the statue would be almost on the horizontal, top third line, while the body is entirely in line with the vertical left hand side line. I wanted to include a bit of extra headspace in this photograph so that the viewer could see all the different colours coming from the stained glass window rather than just focussing on the statue. Furthermore, to make sure I include that background and show its full beauty, I made sure to include looking space. Looking space is an important technique in portrait photography that is related to the rule of thirds. Essentially, placing the subject to the side of the shot and having them look into the space (rather than being placed in the centre of the shot) creates a more pleasing composition, and I wanted this in particular to allow more space for the background. Finally in this photograph, I made sure to take it from an angle that is low down, giving the statue a sense of superiority. I think this is important, especially in the context of a cathedral, accompanied by lights shining into the photo from the background, as this gives an almost holy sense to the viewer.

IMG_0630.JPG


References

Appleyard, D. (2019). Quick Tip: Giving a Subject Looking Space. [online] Photo & Video Envato Tuts+. Available at: https://photography.tutsplus.com/articles/quick-tip-giving-a-subject-looking-space–photo-3369 [Accessed 20 Jun. 2019].